Since we’re not finding out the gender of Baby K we decided to
pick a fun color scheme for our nursery. We knew we wanted something light and
bright, and we wanted to keep it classy. So, over Memorial weekend we found out
Home Depot was having a $5 off paint sale… and that was our jumping off point. We perused the store for a bright base color that was not
too neutral but not overwhelming. Previously, the nursery was our office and it
was a darker brown color, which made the room look small.
 |
| Our office before |
 |
| furniture removed, working on taping and patching holes |
We settled on a color called double click, which is bright
grey and began taping and painting, it took about 3 coats to really cover all
the brown, but as you can see the brightness of the gray makes the room look so
fresh and open.
 |
| Our first coat of paint on one wall |
 |
| Patching huge holes from the previous curtains |
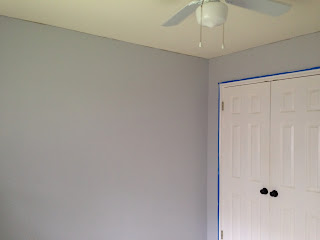 |
| A couple coats of paint on the wall, still needing to do touchups |
We thought it’d be even lighter and better if we could add
crown molding so I took to
Pinterest to find out how to do it. These were the 2
tutorials I found most helpful:
This Old House, this one includes a video of the type of cuts, and
Home Depot. I had a $100 gift card to Home Depot, and with that, we were able
to purchase all of our supplies for the room.
We had no idea the enormity of the project we took on...it
took a lot of patience and a couple of weeks of work to actually get it looking
good.
Here are some pictures of the whole process:
 |
| Our supplies to transform the room |
 |
| My husband looking for studs to make sure we can correctly anchor the trim |
 |
| Our lovely work space...most people use the garage..not us |
 |
| Making sure the crown fits |
 |
| Figuring out how to do outside and inside corners is tough |
 |
| The corners were so tough we had to redo some of them by cutting in and installing the pre-made corners. They ended up looking even better and added such an elegant look! |
 |
| Step 432 : Caulking..thankfully my husband is the best and oh so handy |
 |
| After a couple of coats of paint on the trim and the wall this is our semi finished product. |
 |
| After a couple of coats of paint on the trim and the wall this is our semi finished product. |
 |
| All the knobs were gold before, I actually painted them all around our house as another project. |
Finally after we had everything trimmed and looking great,
we had new carpet installed…Ta Daaa…
 |
| Still missing face plates but don't you love the subtle design in the carpet...now baby truly has a "fresh start." |
Our accent colors are orange and turquoise and we have
espresso colored furniture to finish it all off. You can check out some of
those pictures on my
Instagram account or just keep reading the blog.
Everything so far has been a fun project so I do plan on writing about every
bit of it! I’ve loved creating this room literally from scratch and we can’t wait
for the arrival of our sweet little baby.


No comments:
Post a Comment